
はじめに
Jetson Nanoが未使用なので、WordPressサーバーにしました。
使用するのは、「Jetson Nano 開発キット B01」です。
Jetson Nanoの準備
用意するもの
- Jetson Nano 開発キット B01
- ACアダプター(5V4A以上)
- microSDカード
- USBマウス・キーボード
- ディスプレイ・HDMIケーブル
- LANケーブル
- 作業用PC
セットアップ
ここを参考にしてセットアップしていきます。
以下は、Windowsでの作業です。
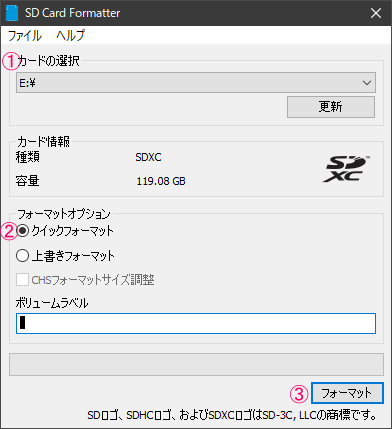
microSDのフォーマット
①カードを選択します。(フォーマッターはここからダウンロード)
②「クイックフォーマット」をチェックします。
③「フォーマット」をクリックしフォーマット開始します。
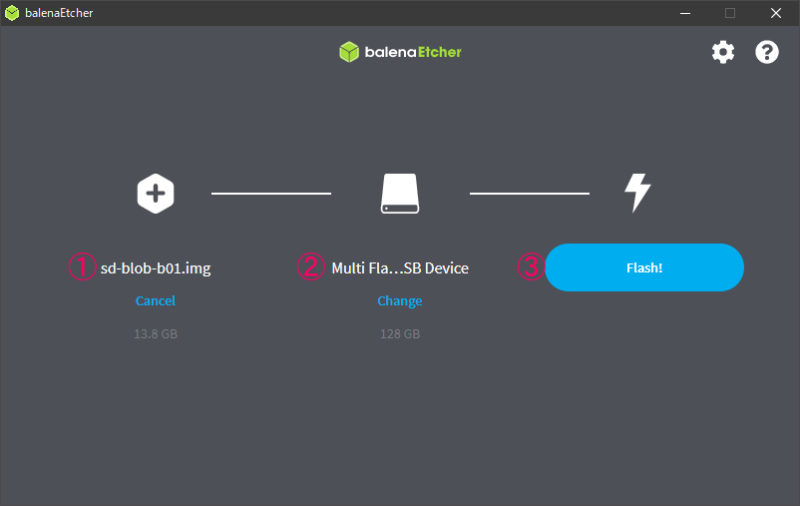
イメージファイルの書き込み
1.「Jetson Nano Developer Kit SD Card Image」 をダウンロードします。
2.書き込みツール「Etcher」をダウンロード、インストールし起動します。
①イメージファイルを選択します。 「jetson-nano-jp461-sd-card-image.zip」
②書き込むmicroSDカードを選択します。
③「Flush!」をクリックして、書き込みの実行を行います。
Jetson Nanoの立ち上げ
イメージの書き込み終了したmicroSDカードをJetson Nanoにセットし、電源を入れます。
OSの設定
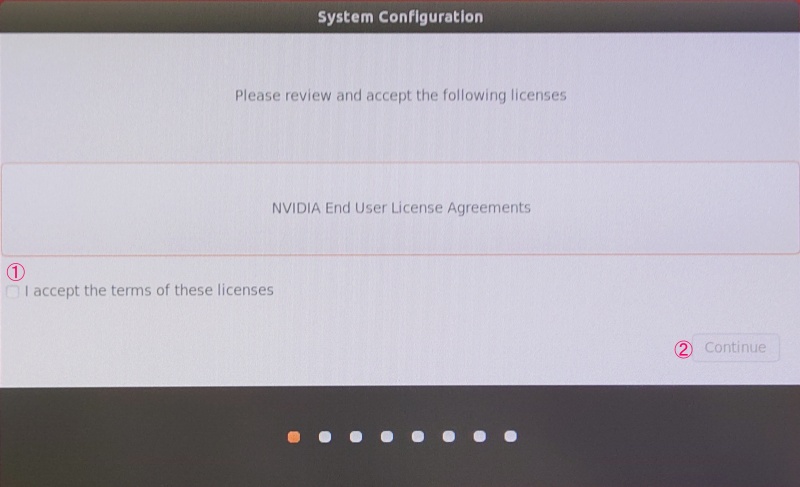
EULAに同意する
①ライセンス確認のチェックを入れる。
②「Continue」をクリックする。
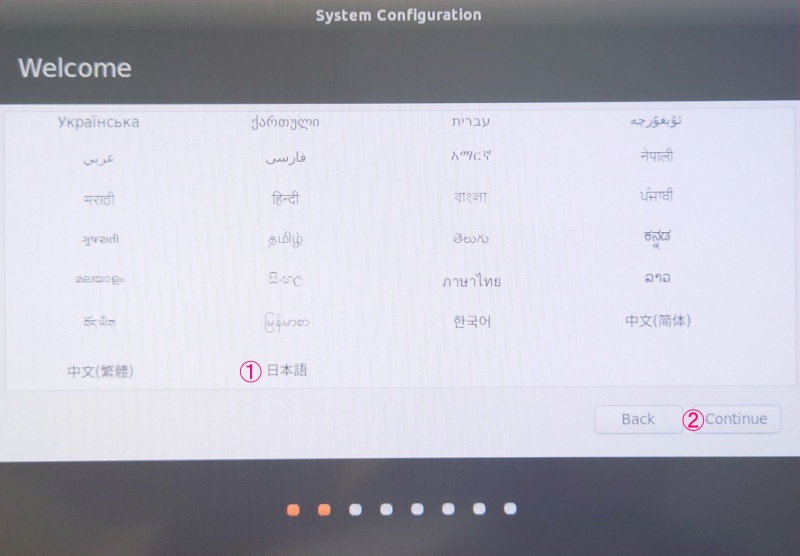
言語の設定
①「日本語」をクリックする。
②「Continue」をクリックする。
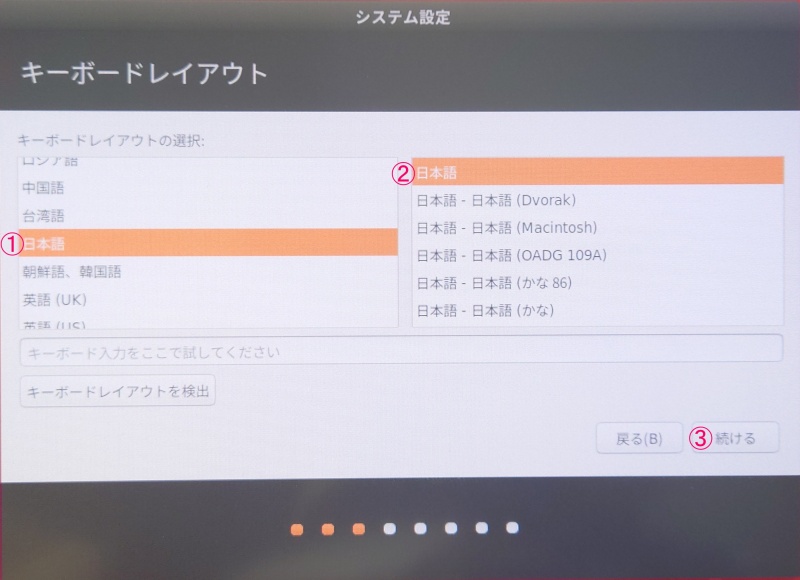
キーボードレイアウトの設定
①「日本語」をクリックします。
②「日本語」をクリックします。
③「続ける」をクリックします。
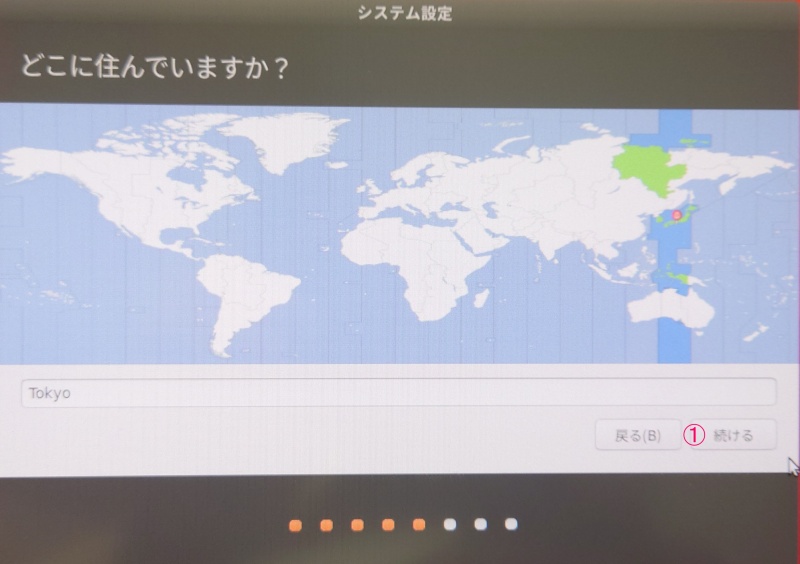
タイムゾーンの設定
①「Tokyo」を確認して、「続ける」をクリックします。
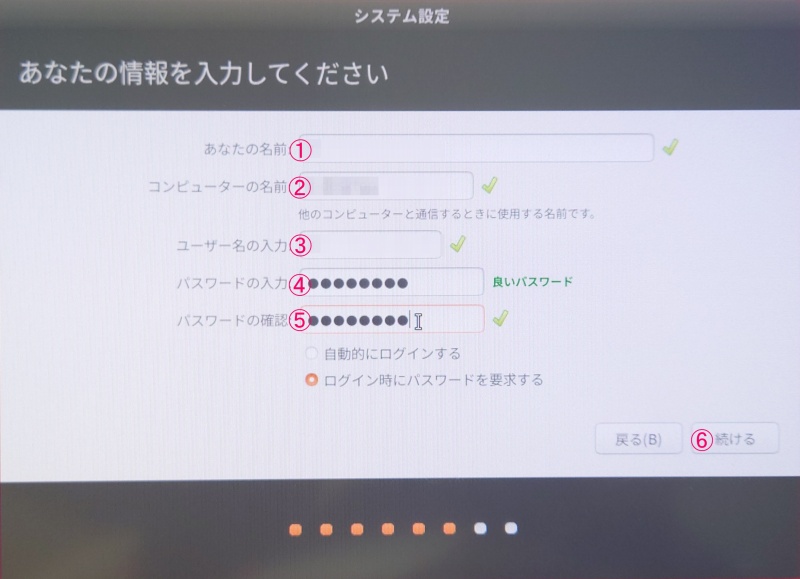
ユーザー名・パスワードの設定
①~⑤の順にユーザー名・パスワードを設定していきます。
⑥「続ける」をクリックします。
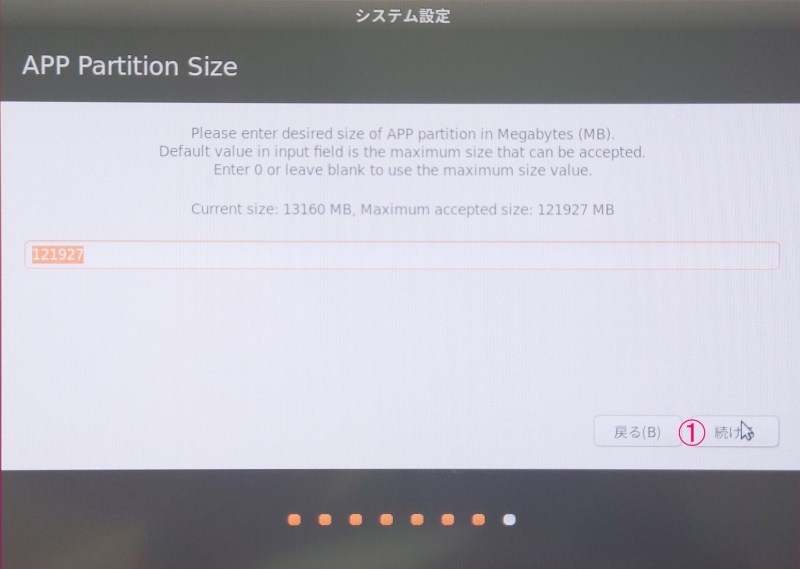
パーティションサイズの設定
①デフォルトでよければ「続ける」をクリックします。
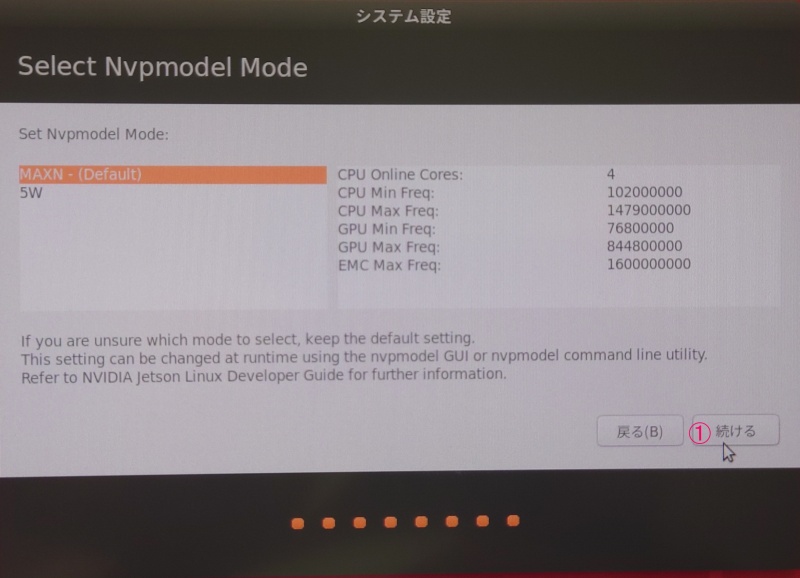
消費電力の設定
①「続ける」を押します。
パッケージの更新
「Terminal」を立ちあげ、パッケージの更新を行います。
アップグレード時に、いろいろ聞かれますがとりあえずデフォルトにしておきます。
nano@jetson:~$ sudo apt update
nano@jetson:~$ sudo apt upgrade
WordPressをインストールするのに、以下のものを使用するのでインストールしていきます。
。
- Apache 2.4.29
- PHP8.2 (バージョン7.4)
- MariaDB(バージョン 10.3)
Apacheのインストール
Apacheのインストールを行います。
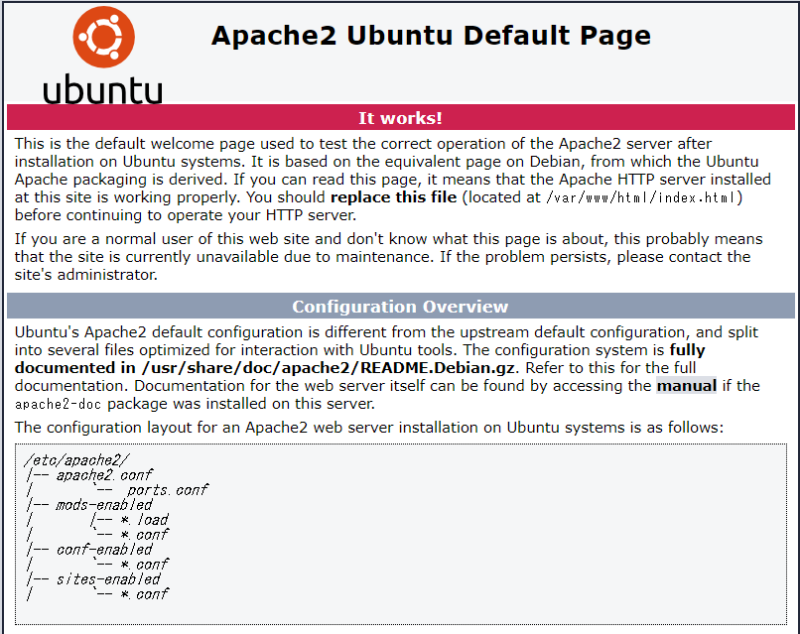
nano@jetson:~$ sudo apt install apache2Apacheのバージョン確認をします。
nano@jetson:~$ apache2 -v
Server version: Apache/2.4.29 (Ubuntu)
Server built:   2023-03-08T17:34:33
インストールが完了し、Webブラウザで「localhost」にアクセスすると以下の画面が表示されます。
nano@jetson:~$ sudo vi /etc/apache2/mods-available/dir.conf

<IfModule mod_dir.c>
        DirectoryIndex index.php index.html index.cgi index.pl index.php index.xhtml index.htm
</IfModule>
PHPのインストール
デフォルトのリポジトリでは、PHP7.2しかインストールできないため、リポジトリを追加します。
nano@jetson:~$ sudo add-apt-repository ppa:ondrej/phpすると、PHP8.2がインストールできるようになるため、インストールします。
nano@jetson:~$ sudo apt install php8.2PHPのバージョンを確認します。
nano@jetson:~$ php -v
PHP 8.2.5 (cli) (built: Apr 14 2023 04:26:23) (NTS)
Copyright (c) The PHP Group
Zend Engine v4.2.5, Copyright (c) Zend Technologies
    with Zend OPcache v8.2.5, Copyright (c), by Zend Technologies
次に、必要なモジュールをインストールします。
sudo apt install php-curl php-json php-mbstring php-mysql php-imagick php-xml php-zipアップロード時のデータサイズを大きくするために、/etc/php/8.2/apache2/php.iniを編集します。
nano@jetson:~$ sudo vi /etc/php/8.2/apache2/php.ini

変更箇所

; Maximum size of POST data that PHP will accept.
; Its value may be 0 to disable the limit. It is ignored if POST data reading
; is disabled through enable_post_data_reading.
; https://php.net/post-max-size
post_max_size = 40M
 ~
; Maximum allowed size for uploaded files.
; https://php.net/upload-max-filesize
upload_max_filesize = 30M
php8.2-fpmをインストールします。
ano@jetson:~$ sudo apt install php8.2-fpm
 ~ 略 ~
Creating config file /etc/php/8.2/fpm/php.ini with new version
NOTICE: Not enabling PHP 8.2 FPM by default.
NOTICE: To enable PHP 8.2 FPM in Apache2 do:
NOTICE: a2enmod proxy_fcgi setenvif
NOTICE: a2enconf php8.2-fpm
NOTICE: You are seeing this message because you have apache2 package installed.
Created symlink /etc/systemd/system/multi-user.target.wants/php8.2-fpm.service → /lib/systemd/system/php8.2-fpm.service.
man-db (2.8.3-2ubuntu0.1) のトリガを処理しています ...
systemd (237-3ubuntu10.57) のトリガを処理しています ...
php8.2-fpm (8.2.5-1+ubuntu18.04.1+deb.sury.org+1) のトリガを処理しています ...
NOTICE: Not enabling PHP 8.2 FPM by default.
NOTICE: To enable PHP 8.2 FPM in Apache2 do:
NOTICE: a2enmod proxy_fcgi setenvif
NOTICE: a2enconf php8.2-fpm
NOTICE: You are seeing this message because you have apache2 package installed.
いらないパッケージを削除しておきます。
nano@jetson:~$ sudo apt -y autoremoveMariaDBのインストール
デフォルトでは、バージョン10.1がインストールされてしまうため、リポジトリ追加します。
必要なパッケージを追加します。
nano@jetson:~$ sudo apt install curlリポジトリを追加します。
ano@jetson:~$  curl -sS https://downloads.mariadb.com/MariaDB/mariadb_repo_setup | sudo bash
# [info] Checking for script prerequisites.
# [info] MariaDB Server version 10.11 is valid
# [info] Repository file successfully written to /etc/apt/sources.list.d/mariadb.list
# [info] Adding trusted package signing keys...
# [info] Running apt-get update...
W: Skipping acquire of configured file 'main/debug/dep11/Components-arm64.yml' as repository 'https://dlm.mariadb.com/repo/mariadb-server/10.11/repo/ubuntu bionic InRelease' doesn't have the component 'main/debug' (component misspelt in sources.list?)
W: Skipping acquire of configured file 'main/debug/dep11/icons-48x48.tar' as repository 'https://dlm.mariadb.com/repo/mariadb-server/10.11/repo/ubuntu bionic InRelease' doesn't have the component 'main/debug' (component misspelt in sources.list?)
W: Skipping acquire of configured file 'main/debug/dep11/icons-64x64.tar' as repository 'https://dlm.mariadb.com/repo/mariadb-server/10.11/repo/ubuntu bionic InRelease' doesn't have the component 'main/debug' (component misspelt in sources.list?)
# [info] Done adding trusted package signing keys
以下のファイルがありますので、バージョン10.3になるように編集します。
nano@jetson:~$ sudo nano /etc/apt/sources.list.d/mariadb.list

# MariaDB Server
# To use a different major version of the server, or to pin to a specific minor version, change $
deb [arch=amd64,arm64] https://dlm.mariadb.com/repo/mariadb-server/10.3/repo/ubuntu bionic main

deb [arch=amd64,arm64 lang=none target-=CNF] https://dlm.mariadb.com/repo/mariadb-server/10.3/re$


# MariaDB MaxScale
# To use the latest stable release of MaxScale, use "latest" as the version
# To use the latest beta (or stable if no current beta) release of MaxScale, use "beta" as the v$
deb [arch=amd64,arm64] https://dlm.mariadb.com/repo/maxscale/latest/apt bionic main
パッケージ情報を更新します。
nano@jetson:~$ sudo apt updateインストールします。
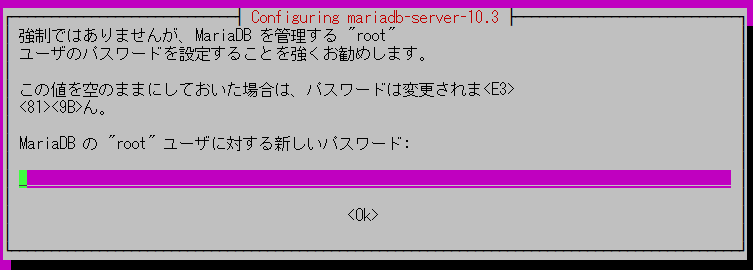
nano@jetson:~$ sudo apt install mariadb-server-10.3インストール中にパスワード設定画面がでますので、rootのパスワードを設定します。
初期設定を行います。
nano@jetson:~$ sudo  mysql_secure_installation

NOTE: RUNNING ALL PARTS OF THIS SCRIPT IS RECOMMENDED FOR ALL MariaDB
      SERVERS IN PRODUCTION USE!  PLEASE READ EACH STEP CAREFULLY!

In order to log into MariaDB to secure it, we'll need the current
password for the root user.  If you've just installed MariaDB, and
you haven't set the root password yet, the password will be blank,
so you should just press enter here.

Enter current password for root (enter for none):
OK, successfully used password, moving on...

Setting the root password ensures that nobody can log into the MariaDB
root user without the proper authorisation.

You already have a root password set, so you can safely answer 'n'.

Change the root password? [Y/n] n
 ... skipping.

By default, a MariaDB installation has an anonymous user, allowing anyone
to log into MariaDB without having to have a user account created for
them.  This is intended only for testing, and to make the installation
go a bit smoother.  You should remove them before moving into a
production environment.

Remove anonymous users? [Y/n] y
 ... Success!

Normally, root should only be allowed to connect from 'localhost'.  This
ensures that someone cannot guess at the root password from the network.

Disallow root login remotely? [Y/n] y
 ... Success!

By default, MariaDB comes with a database named 'test' that anyone can
access.  This is also intended only for testing, and should be removed
before moving into a production environment.

Remove test database and access to it? [Y/n] y
 - Dropping test database...
 ... Success!
 - Removing privileges on test database...
 ... Success!

Reloading the privilege tables will ensure that all changes made so far
will take effect immediately.

Reload privilege tables now? [Y/n] y
 ... Success!

Cleaning up...

All done!  If you've completed all of the above steps, your MariaDB
installation should now be secure.

Thanks for using MariaDB!
rootユーザーでログインしてみます。
nano@jetson:~$ sudo mysql -u root -p
Enter password:
Welcome to the MariaDB monitor.  Commands end with ; or \g.
Your MariaDB connection id is 38
Server version: 10.3.39-MariaDB-1:10.3.39+maria~ubu1804 mariadb.org binary distribution

Copyright (c) 2000, 2018, Oracle, MariaDB Corporation Ab and others.

Type 'help;' or '\h' for help. Type '\c' to clear the current input statement.

MariaDB [(none)]> quit
Bye
nano@jetson:~$
WordPressのインストール
WordPressのダウンロード
nano@jetson:~$ wget https://ja.wordpress.org/latest-ja.tar.gz確認します。
ls -l latest-ja.tar.gz
-rw-rw-r-- 1 nano nano 23836030  3月 30 23:00 latest-ja.tar.gz
解凍を行います。
nano@jetson:~$ tar -xzvf latest-ja.tar.gz確認します。
nano@jetson:~$ ls -l
total 23328
・・・
-rw-rw-r-- 1 nano nano 23836030  3月 30 23:00 latest-ja.tar.gz
drwxr-xr-x 5 nano nano     4096  3月 30 23:00 wordpress
データベースとユーザーを設定します。
nano@jetson:~$ mysql -u root -p
Enter password:
ERROR 1045 (28000): Access denied for user 'root'@'localhost' (using password: YES)
nano@jetson:~$ mysql -u root -p
Enter password:
Welcome to the MariaDB monitor.  Commands end with ; or \g.
Your MariaDB connection id is 47
Server version: 10.3.39-MariaDB-1:10.3.39+maria~ubu1804 mariadb.org binary distribution

Copyright (c) 2000, 2018, Oracle, MariaDB Corporation Ab and others.

Type 'help;' or '\h' for help. Type '\c' to clear the current input statement.

MariaDB [(none)]> create database wordpress_db;
Query OK, 1 row affected (0.006 sec)

MariaDB [(none)]> grant all privileges on wordpress_db.*  to "wordpress_user"@"localhost" identified by "yawata02348";
Query OK, 0 rows affected (0.006 sec)

MariaDB [(none)]> flush privileges;
Query OK, 0 rows affected (0.006 sec)

MariaDB [(none)]> quit;
Bye
nano@jetson:~$
サーバーのフィルダーにコピーします。
nano@jetson:~$ sudo cp -R ./wordpress/* /var/www/html/
nano@jetson:~$
コピーしたフォルダーの所有者を変更します。
sudo chown -R www-data:www-data /var/www/html/WordPressの設定
Webブラウザーにて「IPアドレス/wp-admin/install.php」の画面にアクセスすると以下の画面が表示されます。「さあ、始めましょう!」をクリックします。

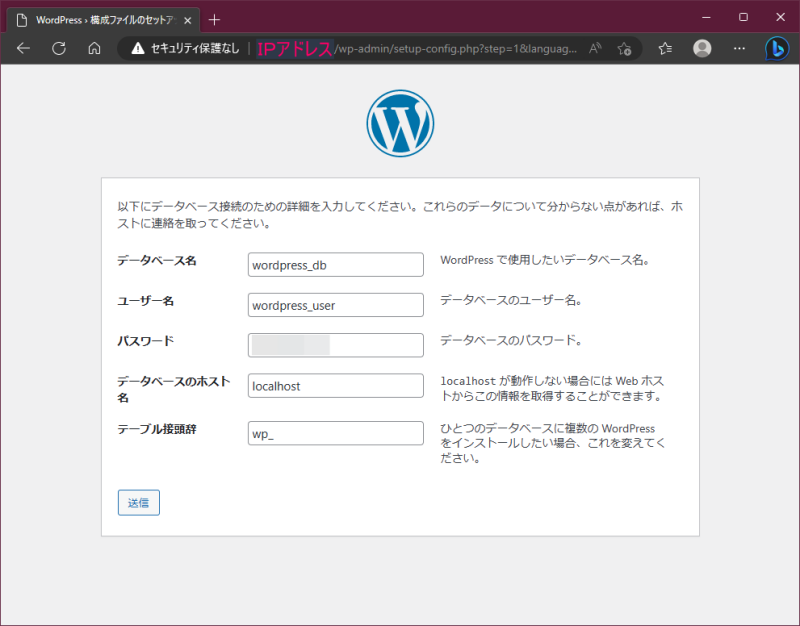
以下の画面になりますので、「データベース名」「データベースのユーザー名」「データベースのパスワード」「データベースのホスト」を設定します。先ほど設定したデータベースの情報を入力し「送信」をクリックします。
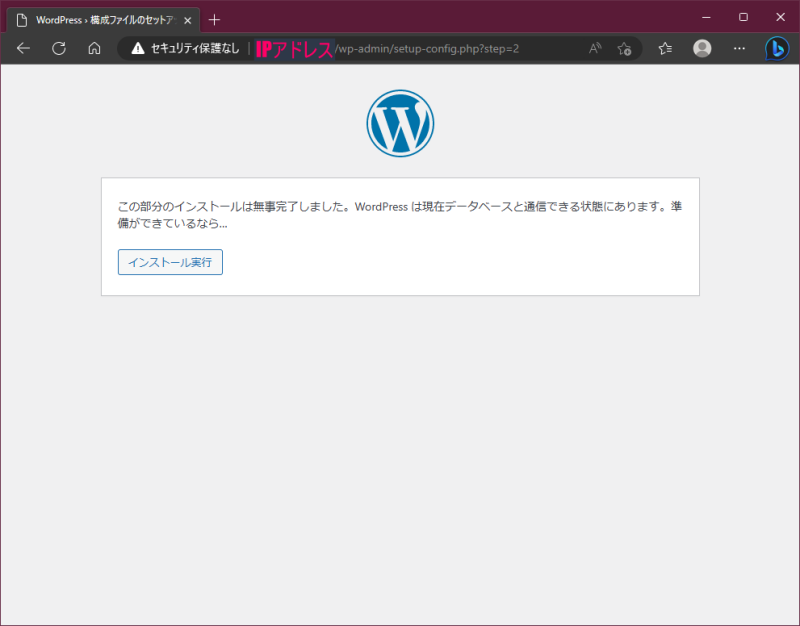
以下の画面に切り替わるので「インストール実行」をクリックします。
以下の情報を入力して「WordPressをインストール」をクリックします。

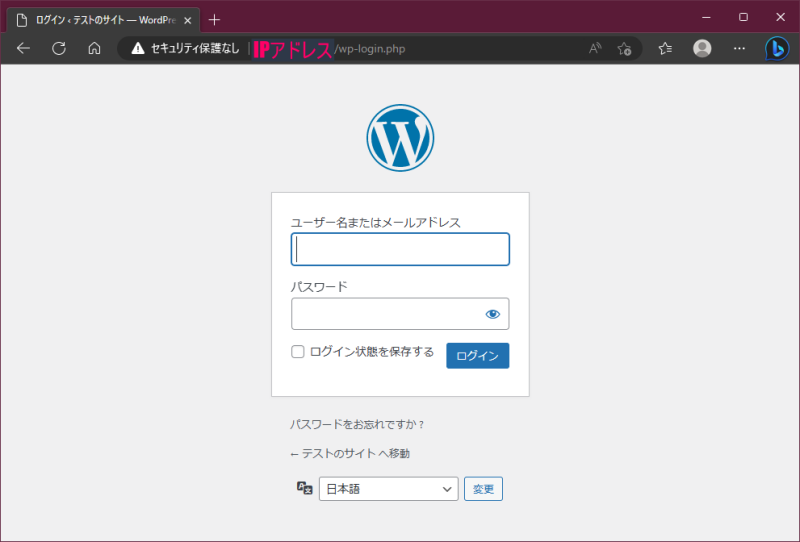
以下の表示が出れば終了です。「ログイン」を押します。

以下の画面から、ユーザー名・パスワードを入力してログインして、WordPressでホームページ作成開始です。

コメント